How to Organize Under Your Kitchen Sink (Finally!)
Let’s dive into this kitchen cabinet conundrum! Organizing under kitchen sink can feel like herding cats, right? One minute, you’re trying to find the right cleaner, and the next, you’re wrestling with a mountain of clutter. But what if I told you that a little effort could turn that chaotic space into a functional, stress-free zone? Let’s break it down step by step.
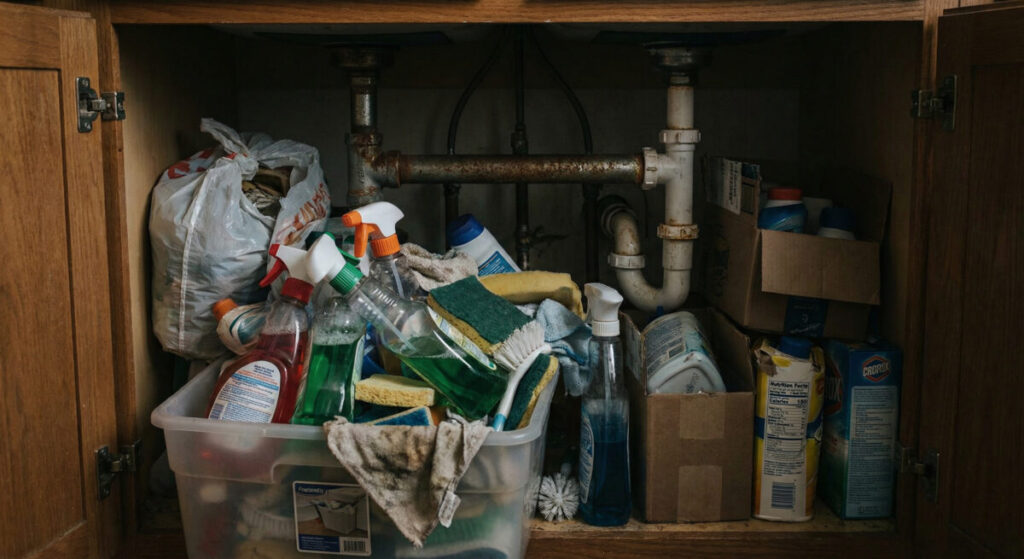
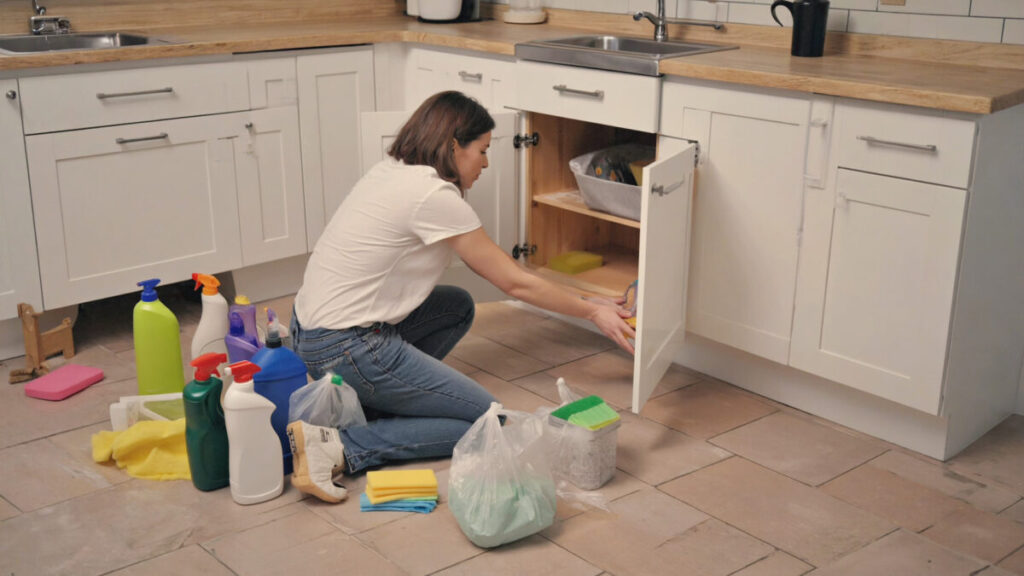
Step 1: Empty Everything (Yes, Everything!)
First things first: pull out every single item under that sink. Don’t try to sort while you’re still emptying—it’s a clean slate we’re aiming for here. This “great purge” is your chance to see exactly what you’re dealing with. Are there items you’ve forgotten about? Old cleaning supplies? Expired food? It’s time to face the truth.
While everything’s out, take a moment to ask yourself a few questions:
- Do I use this at least once a season? If not, it’s probably time to let it go.
- Is it expired or partially used? Cleaning sprays, glue, and even vinegar lose their potency over time. Check those dates!
- Does it belong here at all? Trash bags, spare keys, and spare light bulbs often end up under the sink by default. Give them a proper home elsewhere.
Pro tip: Keep a trash bag, a donation box, and a “keep” pile right next to the cabinet. It’ll make the decision-making process faster and less overwhelming.
Step 2: Deep-Clean the Cabinet & Address the “Leak Factor”
Now that the space is empty, it’s time to clean. Scrub the shelves, walls, and floor. This is your chance to tackle years of soap scum, dust, and mystery spills. But here’s the thing: even the tidiest cabinet can fall apart if there’s a leak.
- Place a waterproof liner or tray (a vinyl shelf liner, a silicone mat, or a shallow plastic bin) directly on the cabinet floor. If a pipe leaks or a bottle spills, you can simply lift the liner or tray and wipe—no damage, no mold, no rebuild.
- Ensure the liner is non-slip and chemical-resistant. You don’t want it sliding or breaking down over time.
Step 3: Categorize & “Zone” Your Items
Now it’s time to group your items into logical families. Think of it like setting up a mini command center under your sink. Here’s how to do it:
- Daily-Use Cleaning Caddy – All-purpose spray, dish soap, scrub brushes, microfiber cloths.
- Bulk/Storage – Extra trash bags, foil, plastic wrap, or cleaning refills.
- Maintenance/Seasonal – Plumbing snake, extra faucet filters, or heavy-duty degreasers (used rarely).
- Safety Items – First-aid kit, fire extinguisher, or pet-safe deterrents (if applicable).
The golden rule here is simple: heavy items low, light/frequently used items at eye level, and hazardous chemicals on the highest shelf or in a locked bin—never on the door where they can tip or be accessed by children or pets.
Step 4: Invest in Smart, Adjustable Organizers
You don’t need to break the bank to get this organized. The key is to invest in containers that maximize vertical space and keep everything visible. Here are some game-changing solutions:
- Adjustable Wire Shelf or Tiered Rack: These double your floor space instantly. Place them low to keep heavy cleaners accessible but stable.
- Clear, Stackable Bins with Handles: Perfect for grouping “trash bags & foil” or “scrubbing supplies.” The transparency eliminates guesswork.
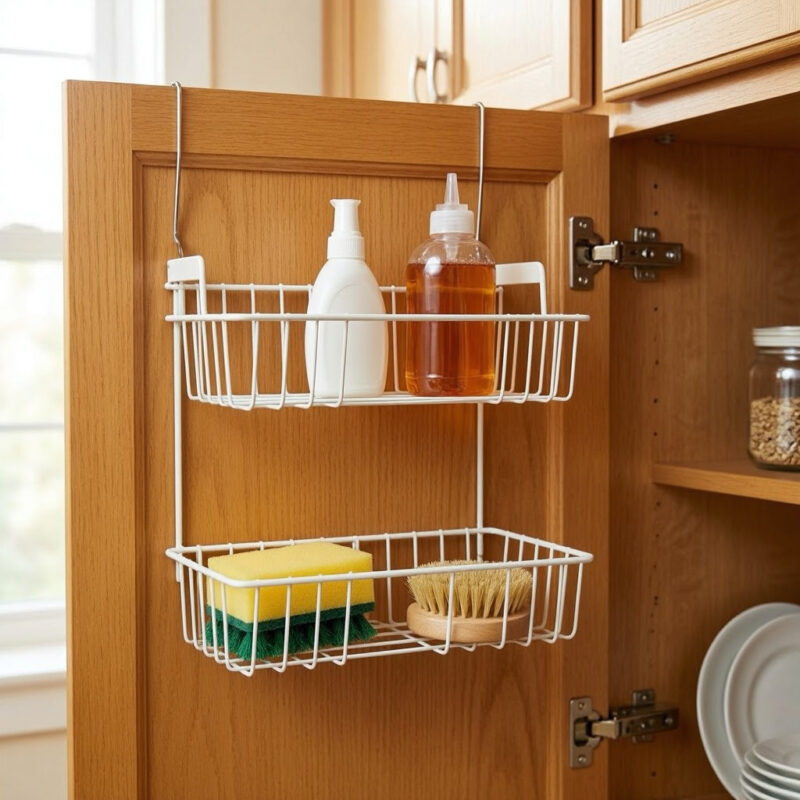
- Over-the-Door Organizer: Use the inside of the cabinet door for lightweight, frequently grabbed items like dish soap, sponges, or zip-top bags. Look for sturdy fabric or clear-plastic pockets that won’t tear.
- Narrow, Rolling Caddy: If you have a deep cabinet, a slim rolling cart lets you pull everything out at once—no more digging in the back corner.
- Tension Rod (Horizontal or Vertical): Mount a horizontal tension rod under the shelf to hang spray bottles by their triggers—neat, visible, and prevents tipping.
Avoid flimsy plastic drawers that crack or wire baskets that become catch-alls. Choose containers that fit snugly to prevent shifting.
Step 5: Place with Purpose & Safety in Mind
Now it’s time to load everything back in. Here’s how to arrange everything for maximum efficiency and safety:
- Bottom Shelf (near the liner): Heavy, stable items—trash bags, paper towels, or a small step-stool if you have high pipes.
- Middle Tier (eye level): Your daily-use cleaning caddy. Keep it in a bin or on a sliding tray so you can grab it in one motion.
- Top Shelf (highest, hardest to reach): Hazardous chemicals (bleach, ammonia, drain cleaner). Store them in their original, labeled bottles, inside a sealed bin for extra spill protection. Never store food, sponges, or utensils on this shelf.
- Door: Light, non-toxic, frequently used items (dish soap, scrub brush, or reusable grocery bags).
Label everything—even if you think you’ll remember. A simple label maker or handwritten tags on the bin front (not the side) keep the system intuitive for everyone in the household.
Step 6: Maintain the System in 5 Minutes a Week
Organization isn’t a one-time fix. Set a 5-minute Sunday reset to keep things in check:
- Sweep out the liner or tray.
- Ensure no bottles are leaking or empty.
- Return any “migrated” items (like a stray takeout menu) back to their proper home.
- Re-label if bins have shifted.
By spending less than five minutes weekly, you prevent the “slow creep” that leads to another chaotic purge six months later.

Pro Tips for Lasting Success
- Use a “Chemical-Safe” Bin: Store all toxic cleaners together in a sealed, opaque plastic bin with a latch. If one bottle leaks, it’s contained.
- Color-Code: Assign a color to each category (e.g., blue bins = cleaning, red = trash/linens). Visual cues make it almost impossible to misfile.
- Go Vertical with Foil/Wrap: Mount a narrow rack or use a dispenser for plastic wrap, foil, and wax paper on the inside of the door—no more unrolling disasters.
- Keep a Small Trash Can Outside the Cabinet: Store a tiny step-can on top of the counter or just beside the sink. It reduces the “dump everything under the sink” habit.
- Re-Audit Annually: Cleaning products evolve; your needs change. Every January (or after a big move/cleaning project), repeat Step 1 quickly to purge outdated items.
Avoid These Common Mistakes
- Stuffing Until the Door Won’t Close: A jammed cabinet is a disorganized cabinet. Leave a 1-inch gap for air circulation and easy access.
- Mixing Food/Consumables with Chemicals: Never store snacks, pet food, or sponges near bleach or ammonia—cross-contamination is dangerous.
- Ignoring the Pipes: If you skip the waterproof liner, you’re not truly organized; you’re just waiting for a leak to ruin your system.
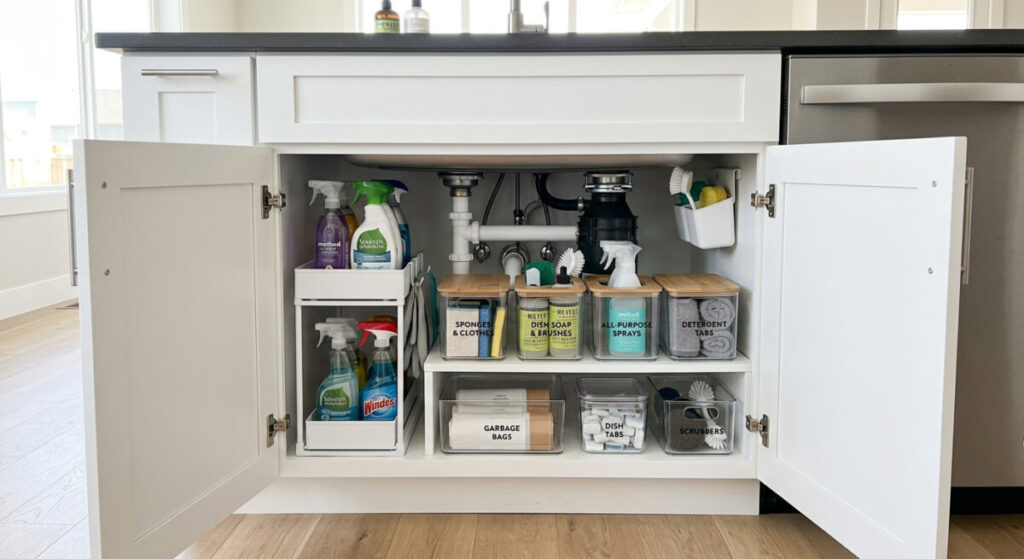
The Result? A Space That Works For You
When you finish, open that cabinet door and feel the difference: no more rummaging, no more sticky floors, no more mystery spills. You’ll grab the right cleaner in one second, replace the trash bags without a game of Tetris, and breathe a sigh of relief knowing your under-sink chaos is finally under control.
You’ve got this!