DIY Tabletop Ideas for Your Home
Transforming a tabletop doesn’t have to be hard. These simple DIY ideas can totally level up your home decor, even if you’re just starting out. I mean, who doesn’t want that instant ‘wow’ factor in a room? Look, I know we all have those surfaces that could use a little love. Sprucing them up doesn’t have tp be complicated or expensive. DIY is just way more fun than it is work, honestly. Plus, there’s that awesome feeling of doing something cool yourself. You get to see the real results of your effort.
Beyond Plain: Creative DIY Tabletop Transformations
Think about your everyday surfaces – they can look boring pretty fast. But with just a little effort, you can make them feel totally fresh and new. Seriously, it’s like giving something old new life! Okay, so DIY isn’t just about saving money. It’s super satisfying to create something cool yourself. And trust me, you don’t need to be a pro to get great results. It’s a fun way to add some personality without breaking the bank or needing tons of fancy skills. I always find that satisfying end result makes me smile.
Wood Wonders: The Classic DIY Tabletop Upgrade
Quick & Easy Wood Tops
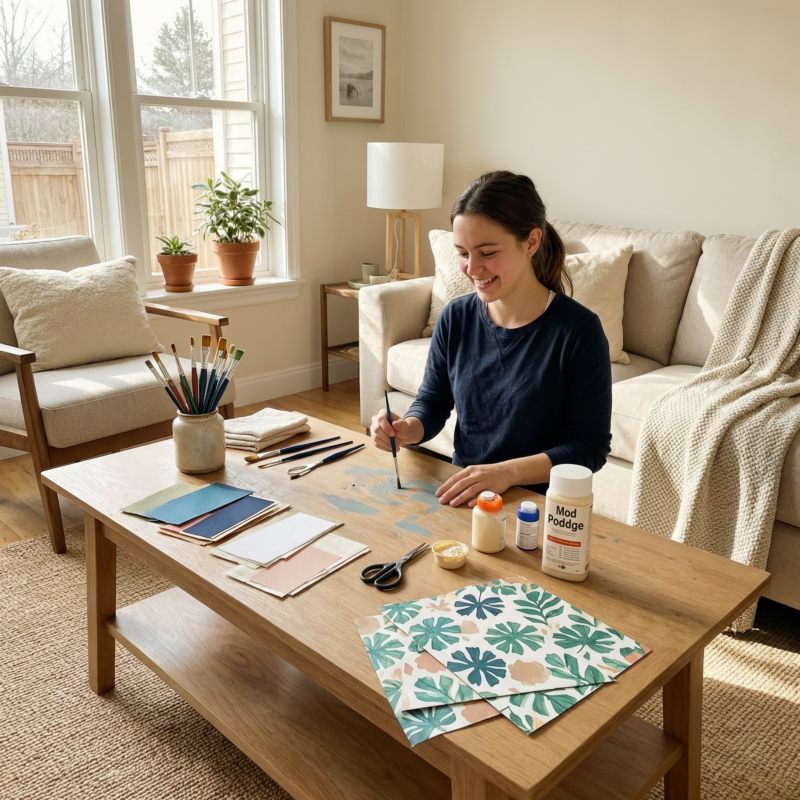
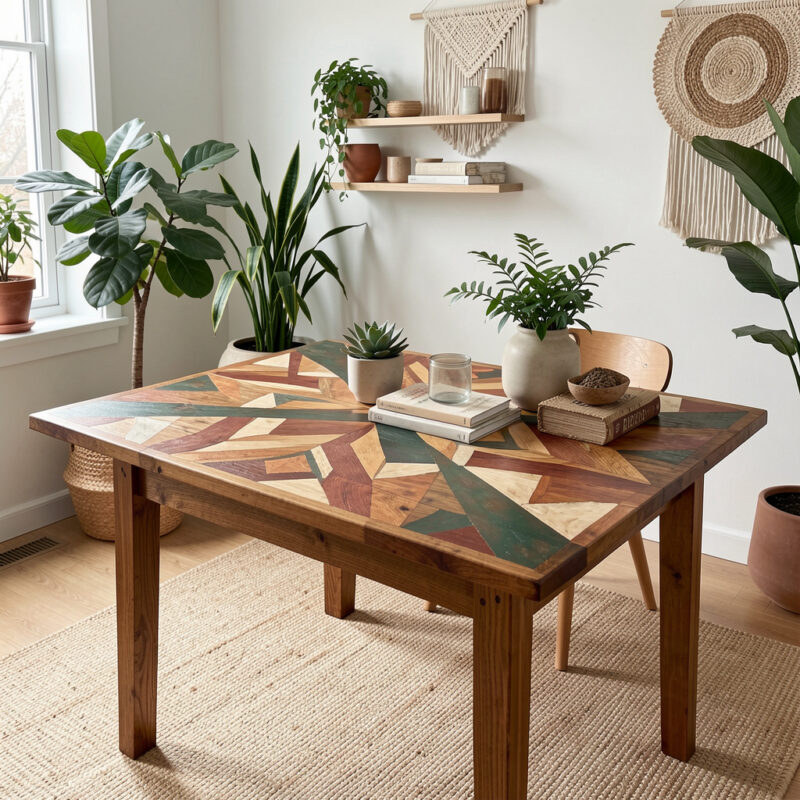
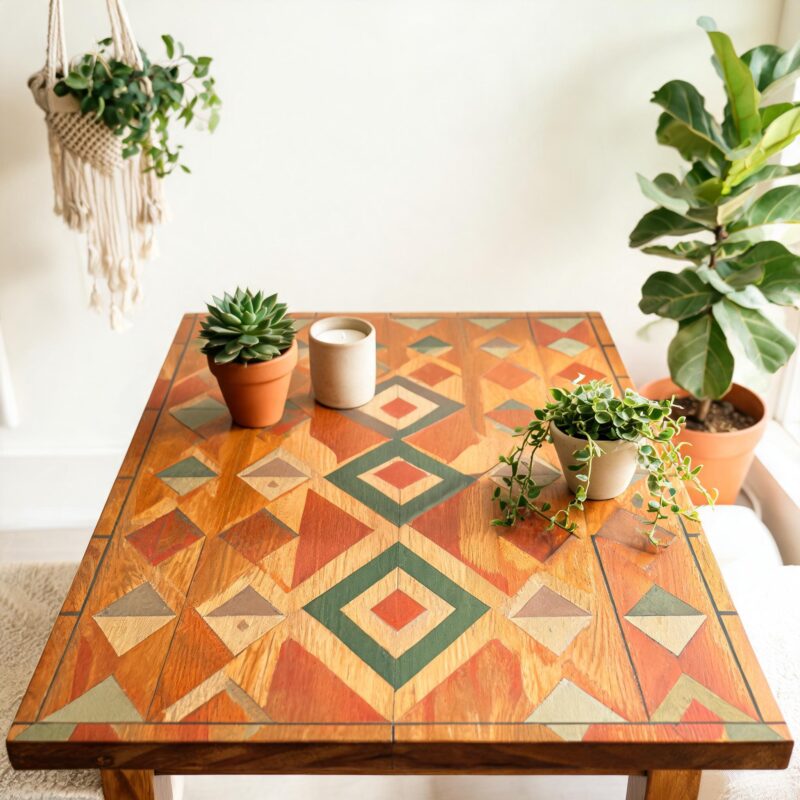
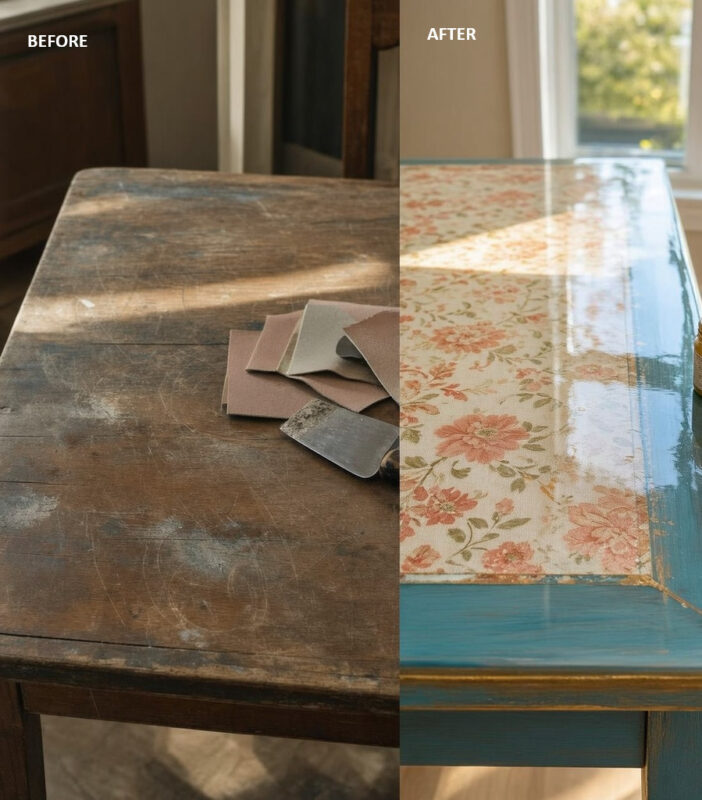
Thinking of giving your wooden surface a new look? Decoupage, simple staining, or just painting cool patterns are all totally doable ways to make a big difference. These methods are budget-friendly and super rewarding to try yourself. Here’s a quick look at getting started with one of the easiest:
What You’ll Need:
* Any clean wooden surface you want to dress up (a cutting board even?)
* Paint and/or stain – pick what looks good to you!
* Mod Podge or some kind of clear sealant (I swear by Mod Podge for most things crafty)
* A brush (good quality helps for smoother finishes!)
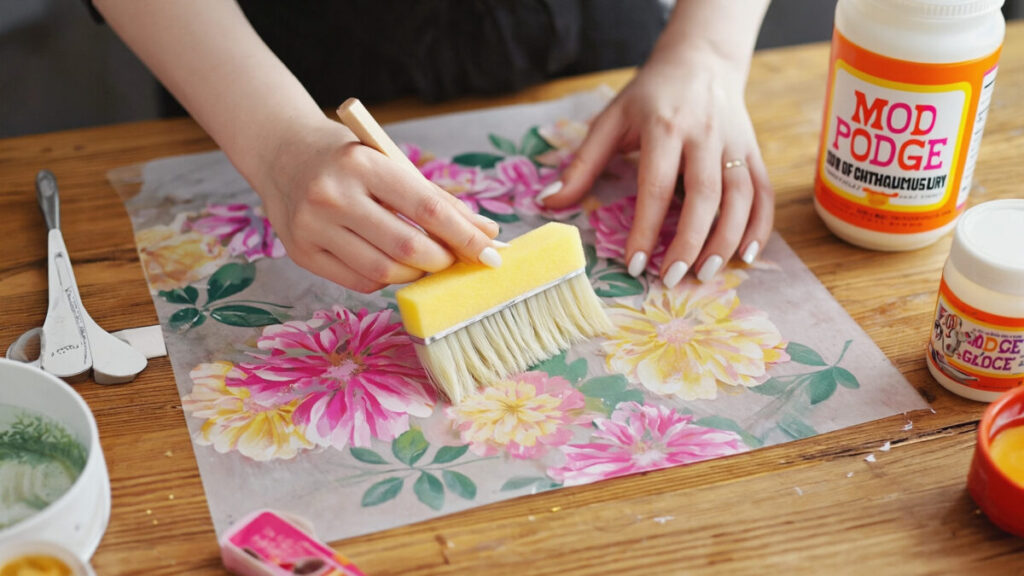
Basic Decoupage Steps:
1. Clean the wood surface really well first – no dusties allowed! Scrubbing with warm soapy water usually does the trick.
2. Cut your paper patterns or designs into small pieces. Magazines, wrapping paper, or even cool printouts work great. Go wild!
3. Apply a thin layer of Mod Podge to the wood, then carefully stick down your paper pieces. Smooth ’em out so no bubbles sneak in. Use a popsicle stick or credit card to get those tricky spots flat.
4. Let it dry, and give it another coat if you think it needs it for extra protection. It’s tempting to use it right away, but patience is key here!
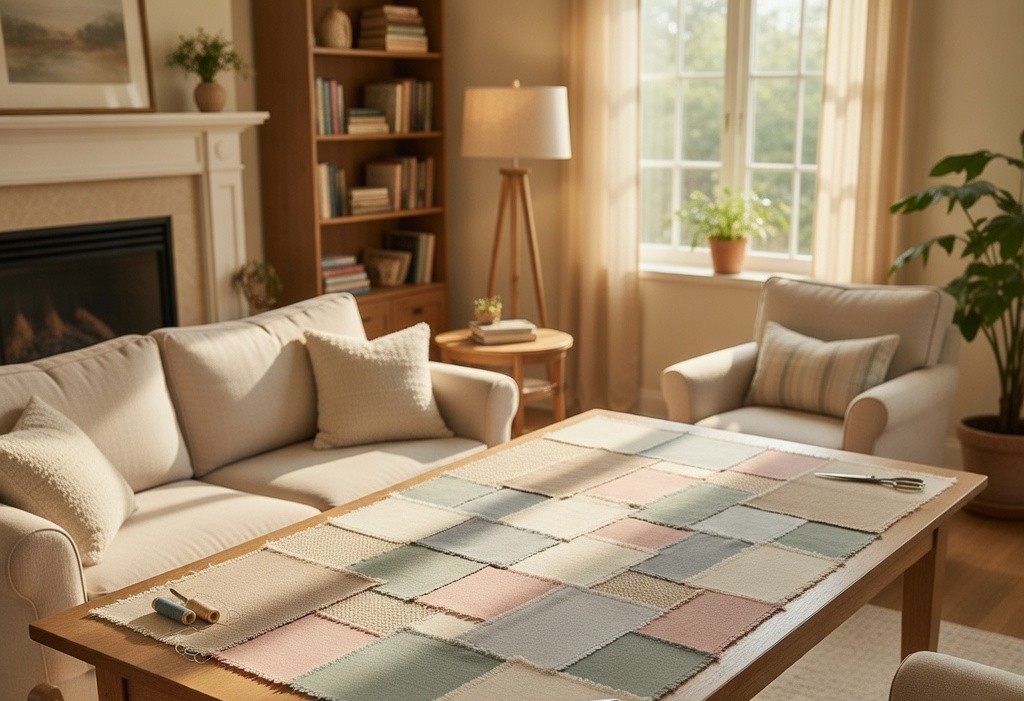
Fabric Fancies: Adding Texture and Style
Quick & Cheap Fabric Fixes
Need to add some softness and style to your tabletops? Using fabric is a cool way to do it. And the best part? Using glue like Mod Podge or fabric glue makes it super durable too. Plus, it adds that lovely tactile element! Here’s a fast idea:
Materials Needed:
* Some small fabric swatches or even rags (finds at a garage sale are perfect!)
* Fabric glue or that clear spray mount stuff (Mod Podge usually works well for this too)
How to Apply It:
1. Cut your fabric into manageable little pieces. Don’t go too crazy too fast – start small!
2. Use some glue on the back of each piece and stick it onto your wood surface. Press it down smooth so it doesn’t wrinkle. A clothes iron (on cotton setting, NO STEAM!) can help set the glue and smooth things out.
3. Let it dry all the way through before you even think about putting anything hot or wet on it. Seriously, wait for it! It’ll thank you later.
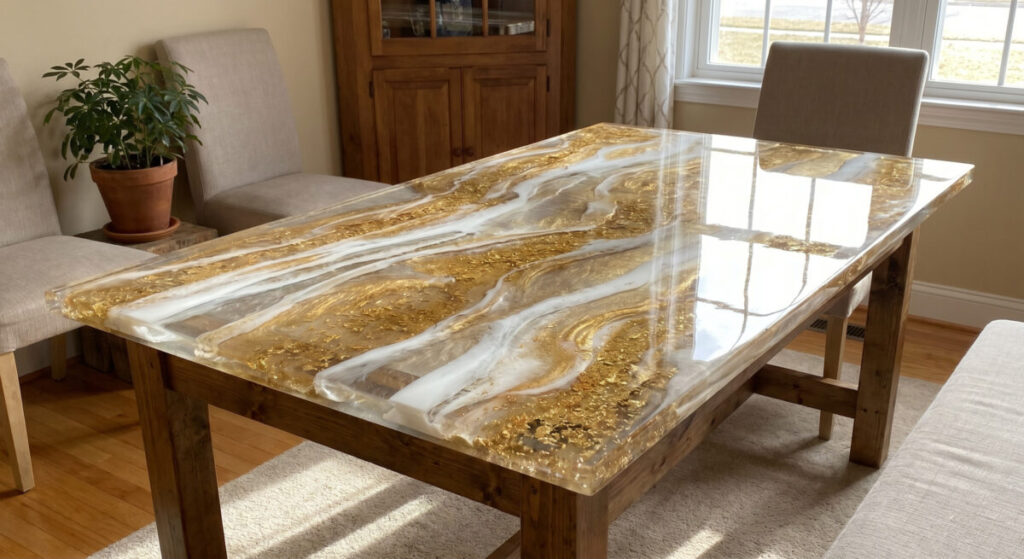
Resin Revelations: Modern & Glam DIY Top
Simple & Shiny Resin Ideas
Want to add some serious sparkle to your table tops? Resin does the trick! Whether you’re making tiny decorative dots or fancy coasters, it can totally elevate your space. Just be ready for a bit more prep!
Important Note (Epoxy Resin):
> Okay, let’s get real: work in a space where you won’t mind a little mess – like a garage or outside if you can. Seriously, I recommend masking off areas you don’t want to deal with later. And yeah, wear some gloves and maybe a dust mask for the fumes. Safety first, always!
The Basics You’ll Need:
* A resin kit – you can find kits at almost any craft store (don’t go overboard unless you’re committed!)
* Some molds to shape your resin creations (silicone baking molds work well for beginners)
* Something to help it cure, like using heat from a heat gun (check your resin instructions carefully! It varies!)

Example: Creating Super Easy Resin Dots or Coasters
1. Mix that resin stuff right up according to the bottle instructions. Getting the ratio right is crucial, measure carefully!
2. Pour the mixed resin into your mold, filling it about halfway or three-quarters full. Don’t overfill – resin expands as it cures. Leave yourself some wiggle room.
3. Wait for it to cure completely (time is specific to the resin type, so read the box religiously! Be patient!).
4. Once it’s rock hard, pop it out of the mold and maybe lightly sand the edges if they’re rough (like, really rough). Give it a final shiny coat if you want.
Beyond the Basics: Whimsical & Functional DIY
Brainstorm Time!
DIY isn’t just about looks, it can make things work better too. Or, you can just have fun with it! Here are a couple of creative ideas I love:
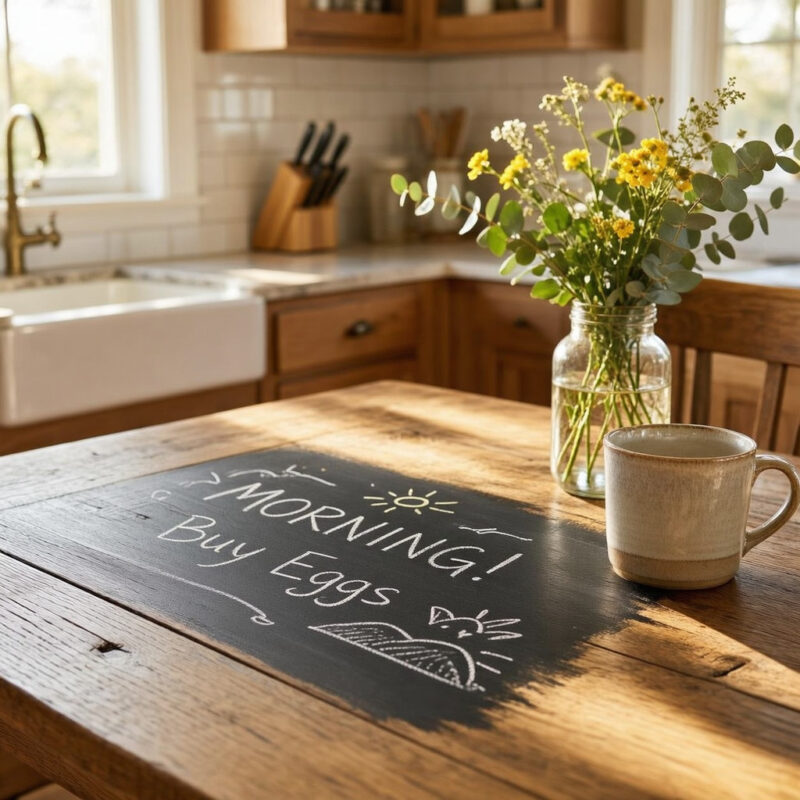
DIY Chalkboard Tabletop Accents:
> Turn part of your table into a mini chalkboard. Just apply some chalkboard paint to a smaller section. Then you can doodle or write notes right there – sound familiar? It’s perfect for leaving quick messages or adding a bit of personality.
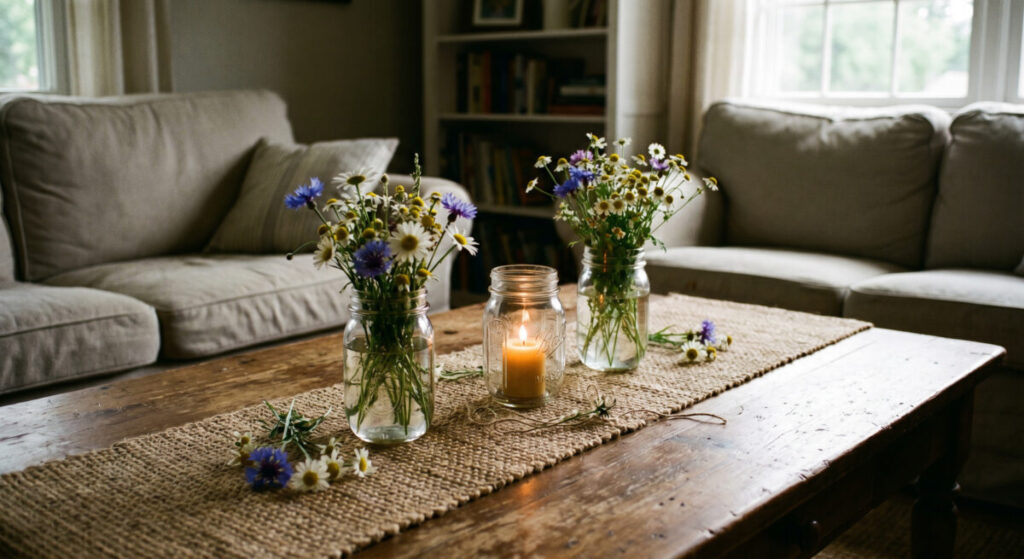
Mason Jar Centerpiece Ideas:
> Turn empty jars into awesome table toppers! Fill ’em up with water, maybe add some flowers or candles. Pop ’em right on your table for a personalized touch. Plus, mason jars are everywhere… it feels intentional!
Seriously, these aren’t huge projects. You can totally tackle one of these to give any surface a much-needed boost.